Kratky Method Step by Step: Grow Lettuce Without Electricity
Grow lettuce in 30–38 days without a pump. This Kratky method guide covers container sizing, the air gap rule, nutrient mixing, and 4 common mistake fixes.

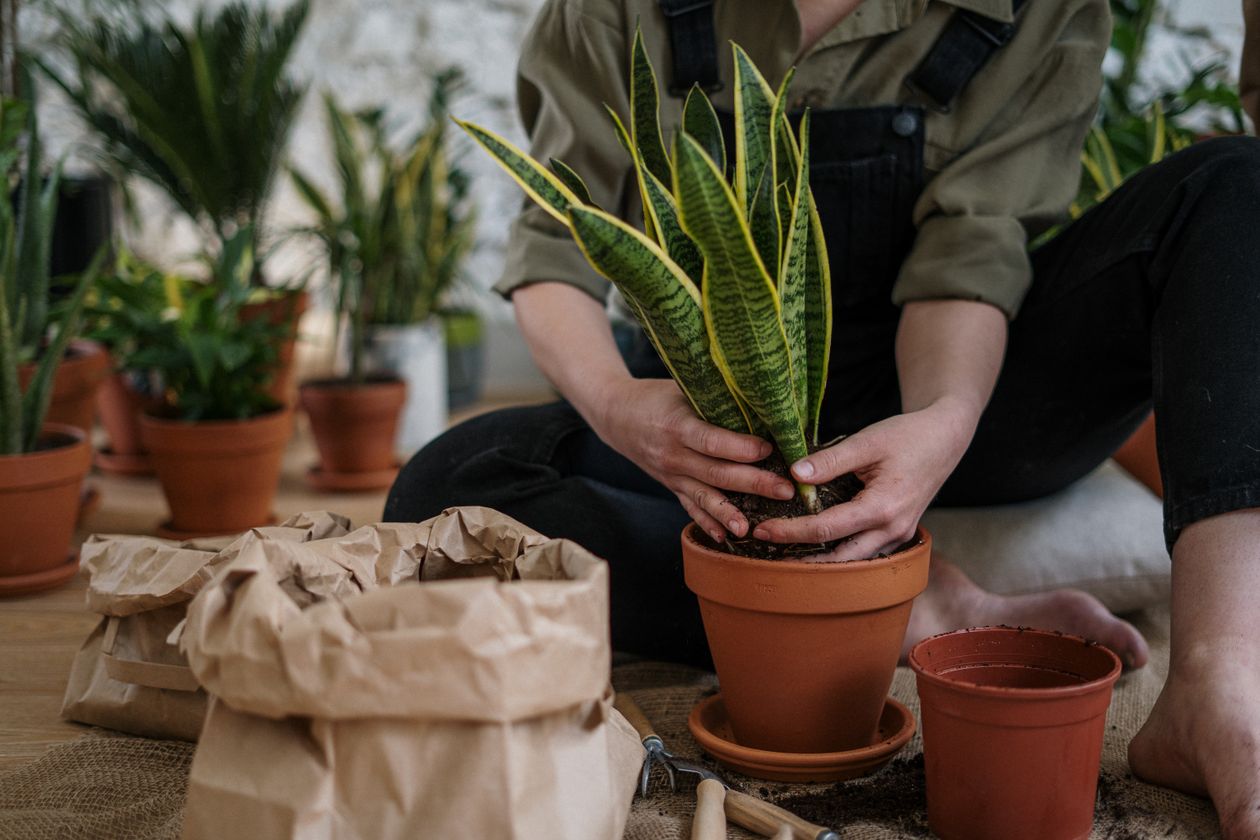
A single mason jar, a handful of clay pebbles, and a cup of nutrient solution. That’s the entire Kratky setup. No pump. No timer. No electricity bill. A head of lettuce goes from seedling to harvest in 30–38 days while the system maintains itself by not refilling at all. The plant drinks the water, the level drops, and roots stretch into the humid air gap to breathe. It’s as close to “set it and forget it” as hydroponics gets.
Most guides explain what the Kratky method is. This one shows you exactly how to build one today, from container prep through your first harvest. If you’re new to hydroponics, the complete hydroponics beginner guide covers the foundational concepts before you dive into setup.
The short version
- Fill your container so the net cup bottom just touches the nutrient solution. Then let the water level drop on its own. That gap is what replaces your air pump.
- Kratky-grown lettuce produces yields statistically identical to actively aerated DWC (24.5g vs. 24.8g dry matter over 35 days) with no pump required (Ohio Academy of Science, Stowe).
- Start EC at 0.8–1.2 mS/cm for seedlings, pH at 5.5–6.0, and let both drift naturally. You don't need to chase daily readings.
- Never submerge the air roots. Overfilling at setup is the single most common way this system fails.
Why Does Kratky Work Without a Pump?
The Kratky method works because plant roots adapt to their environment. When the water level drops beneath a net cup, roots that were submerged grow upward into the humid air space and become “air roots”. Thicker, more branched structures that absorb atmospheric oxygen directly. Lower roots extend into the solution to pull nutrients. In 2025, a controlled trial published by the Ohio Academy of Science found that passive Kratky systems produced 24.5g of lettuce dry matter over 35 days. Matching aerated DWC (24.8g) with no mechanical input (Stowe, Ohio Academy of Science).
[UNIQUE INSIGHT] The sealed reservoir reaches nearly 100% relative humidity inside the air gap. Air roots don’t dry out. They absorb gaseous oxygen from that moist headspace, the same way mangrove roots breathe above tidal water. No air stone can replicate this natural balance, and for leafy greens, it doesn’t need to.
When Kratky doesn’t work well: Fruiting crops like tomatoes and cucumbers drain a passive reservoir fast, and their large root systems need more dissolved oxygen than the air gap provides at scale. Warm climates are also a challenge. Water above 72°F (22°C) holds significantly less dissolved oxygen, which can trigger root rot even in an otherwise healthy setup.
What Do You Need to Start a Kratky System?
UF/IFAS Extension recommends a minimum 1-gallon container per lettuce plant for a Kratky setup (UF/IFAS Extension, 2025). Container sizing is where most beginners go wrong first. Too small and roots run out of room before harvest.
| Container | Capacity | Best for | Net cup size |
|---|---|---|---|
| Mason jar | 1 qt / 32 oz | 1 herb or leaf lettuce (tight fit) | 2-inch |
| 1-gallon jug | 1 gal | 1 full-size lettuce head (minimum) | 2-inch |
| 5-gallon bucket | 5 gal | 1 large plant or long-season herb | 3-inch |
| 16-qt storage tote | 16 qt | 4–6 lettuce heads (multiple holes) | 2-inch ×4–6 |
Beyond the container, you need:
- Net cups: 2-inch for seedlings, 3-inch for larger plants
- Growing medium: Clay pebbles are the most forgiving choice. They drain, re-wet easily, and don’t compact. Rockwool cubes give the best germination rate but need to be soaked in pH-adjusted water before use.
- Nutrients: Hydroponic formula only. Soil fertilizer lacks calcium, magnesium, and sulfur, and won’t dissolve correctly. A single-part formula like MaxiGro at 7g per gallon covers leafy greens. Three-part systems (Micro → Grow → Bloom) give more control as plants mature.
- pH kit: A liquid drop kit works. A digital pen is faster if you’re running multiple containers.
- Grow light: Only needed without a south-facing window. If you do need supplemental light, 16W actual draw per square foot handles most leafy greens (Oklahoma State University Extension).
What you can skip: an air pump, a water chiller, a timer, a nutrient reservoir heater, and most of the gear sold in hydroponic stores. The Kratky method was designed for resource-limited settings. Simplicity is a feature, not a limitation.
How Do You Set Up a Kratky System, Step by Step?
Work through these seven steps in order. Step 5 is where most beginners go wrong.
Step 1. Light-proof your container. Any light hitting the nutrient solution feeds algae. Wrap the container in black electrical tape or paint it black. Mason jars need full coverage. Light passes straight through glass. Dark plastic totes usually only need a covered lid.
Step 2. Cut the lid. Drill or cut a hole sized to your net cup. The cup should sit snugly with no gaps around the rim. Gaps let in light and let humidity escape. If you’re using a 1-gallon jug, the neck opening sometimes fits a 2-inch net cup without cutting.
Step 3. Germinate your seeds. Soak a rockwool cube in pH 5.5 water for 30 minutes, then place 1–2 seeds per hole. Keep the cube moist at 70–75°F for 5–7 days until the seedling is 2–3 cm tall. Alternatively, start seeds directly in clay pebbles with the net cup sitting in a shallow tray of fresh water until the root tips emerge from the bottom.
Step 4. Mix your nutrient solution. Target EC 0.8–1.2 mS/cm for seedlings in their first two weeks. Once established (week 3 onward), raise to 1.2–1.8 mS/cm for lettuce (Oklahoma State University Extension). Mix 3-part formulas in order: Micro → Grow → Bloom. Adjust pH to 5.5–6.0 after mixing. Starting slightly acidic lets the solution drift upward naturally through the optimal range rather than spiking past it.
Step 5. Fill the container and set the air gap. This is the step that decides whether the system works. Fill so the bottom of the net cup just touches, or sits 1 cm above, the nutrient solution. Capillary wetting will draw solution up through the clay pebbles to keep roots hydrated. That first small gap, even if it’s barely visible, is where air roots will begin forming. Don’t fill to the brim. Don’t overfill “just to be safe.” The gap grows as the plant drinks, and that’s exactly what should happen.
Step 6. Place your seedling and set your light schedule. Lower the seedling (still in its net cup) into position. For leafy greens: 16 hours on / 8 hours off. A south-facing window in a temperate climate is enough for lettuce through spring and autumn. Supplemental light only if natural light is genuinely limited.
Step 7. Check pH every 2–3 days. That’s the complete maintenance routine for a lettuce crop. Check pH, make small adjustments if it drifts above 6.5 or below 5.5, and watch the water level drop. Per UH CTAHR’s research on non-circulating hydroponic methods, a single initial fill is sufficient for a 30–38 day lettuce cycle (UH CTAHR).
[PERSONAL EXPERIENCE] Add your first setup story here. What container you used, where you placed it, whether you overfilled, what you’d do differently. This is where readers connect with the reality of first attempts.
Kratky Jar Root Zones. What's Happening Inside
As the plant drinks, the solution level drops and the air gap grows. This is normal and healthy, not a sign the plant needs water.
What Is the Air Gap and Why Does It Matter?
The air gap is the entire mechanism that makes Kratky work without a pump. As water drops, roots split into two functional zones: upper “air roots” that grow into the humid headspace and absorb atmospheric oxygen directly, and lower “water roots” that stay submerged to pull nutrients and water (Atlas Scientific, 2025).
How much gap is normal at each stage:
- Seedling (week 0–1): 0–1 cm. Roots are still mostly in the growing medium
- Week 2: 2–3 cm. White roots will be visible hanging below the net cup
- Week 3+: 3–5 cm is normal. The jar looks almost empty. That’s fine.
The top-off question. This is where most guides give an oversimplified answer. For a 30–38 day lettuce crop, don’t top off at all. The starting volume is designed to last the cycle (UH CTAHR). For long-season herbs like basil or mint, topping off is fine. But only add solution slowly down the side of the container to restore the lower zone. Never fill to the brim. Once air roots develop (around week 2), submerging them causes hypoxic stress within hours. That’s the nuance most guides skip: it’s not top-off vs. no top-off. It’s where in the container you add solution.
Troubleshooting: The 4 Things That Go Wrong
Brown, slimy roots → root rot. The cause is almost always one of three things: overfilling at setup (roots never formed an air zone), a warm reservoir above 72°F (22°C) where water holds less dissolved oxygen, or air roots submerged after a too-generous top-off. Warm, stagnant, hypoxic water invites Pythium. An oomycete pathogen that colonizes and destroys root tissue fast. Fix: pour off enough solution to restore a visible air gap, move the container somewhere cooler, and add 5 mL of 3% hydrogen peroxide per gallon as an emergency measure. Peroxide breaks down into water and oxygen, temporarily improving root zone conditions without leaving residue.
Quick check: white or light-tan firm roots = healthy (or harmless mineral staining). Slimy, brown, mushy roots with a swampy odor = active infection requiring immediate action.
Green slime on the container walls → algae. Cause: light reaching the nutrient solution. Algae competes for nutrients and crashes pH. Fix: re-wrap the container completely and check the lid for gaps around the net cup rim. A strip of black felt around the net cup base eliminates most lid-gap light leaks.
Wilting despite water in the jar → roots drowning. Cause: overfilling at the start. Roots never developed an air zone and can’t get oxygen even though they’re submerged. If caught in week 1, pour off 30–40% of the solution immediately to force air gap formation.
Yellow lower leaves → pH drift or nutrient lockout. Check pH first. Above 6.5, iron and phosphorus precipitate out of solution. The nutrients are present but chemically unavailable. Bring pH back to 5.8–6.2. If pH is in range, EC may be too low for the plant’s current growth stage. Re-mix to 1.4–1.8 mS/cm for established lettuce (pH and nutrient guide for beginners).
[PERSONAL EXPERIENCE] Note any root rot or algae experience here. What caused it, what fixed it, what you do differently now. Specific details make this section stand out.
Scaling Up: From One Jar to Many Plants
A 16-quart storage tote with four to six 2-inch net cup holes lets you grow a full lettuce patch from one reservoir. Cost: under $5 for the tote.
A few things change when you move from jar to tote:
- Keep one crop type per tote. Lettuce and basil need different EC levels, and you can’t optimize one solution for both at the same time.
- Label each tote with the date you filled it. This lets you track days to harvest without guessing when each crop started.
- Larger totes hold more thermal mass, which keeps reservoir temperature more stable than a small jar. A real advantage if your room runs warm.
[INTERNAL-LINK: best crops to start with → best-hydroponic-crops-beginners]
Once you harvest your first head of lettuce, you’ll see exactly where the water level was and where roots were at each stage. That visible record is the best education the Kratky method offers. The whole cycle plays out in front of you, and there’s nothing to adjust until you cut the leaves.
Does the Kratky method need an air pump?
No. As the plant drinks the nutrient solution, the water level drops and creates a high-humidity air gap inside the reservoir. Upper roots grow into this space and absorb atmospheric oxygen directly. The same gas exchange mechanism that mangrove roots use above tidal water. No mechanical aeration needed.
How often do you add water to a Kratky system?
For a 30–38 day lettuce crop, you don’t add water at all. The starting volume is calculated to last the full cycle (UH CTAHR). For long-season herbs or fruiting crops, top off only to restore the lower root zone, never to the brim. Submerging established air roots causes hypoxic stress within hours.
What container size do I need for Kratky lettuce?
At minimum, 1 gallon per lettuce plant. A 5-gallon bucket suits large or long-season varieties. Herbs like basil and cilantro grow well in a 1-quart mason jar. If you’re growing multiple plants, a storage tote with multiple net cup holes is the most efficient option per dollar.
Why are my Kratky roots turning brown?
Check texture and smell before assuming root rot. Firm roots with a tan or brown tint and no odor are usually just mineral staining. Harmless and no treatment needed. Slimy, mushy roots with a swampy smell are active Pythium infection. The most common cause is overfilling at setup. Restore the air gap and lower the reservoir below 72°F.
Can you grow tomatoes with the Kratky method?
Technically yes, but it’s difficult. Tomatoes consume large water volumes, need high EC (3.0–4.0 mS/cm), and develop root systems that quickly outgrow a passive reservoir. Controlled trials show Kratky yields match DWC only for short-cycle leafy greens. Grow lettuce through a few cycles first, then experiment with fruiting crops if you want to.
Sources (6)
- UH CTAHR, Three Non-Circulating Hydroponic Methods for Growing Lettuce, retrieved 2026-06-08, https://www.ctahr.hawaii.edu/hawaii/downloads/three_non-circulating_hydroponic_methods_for_growing_lettuce.pdf
- UF/IFAS Extension St. Lucie County, Kratky Hydroponic Method: A Simple Way to Grow Plants Without Soil, 2025, retrieved 2026-06-08, https://blogs.ifas.ufl.edu/stlucieco/2025/04/17/kratky-hydroponic-method-a-simple-way-to-grow-plants-without-soil/
- Oklahoma State University Extension, Electrical Conductivity and pH Guide for Hydroponics, retrieved 2026-06-08, https://extension.okstate.edu/fact-sheets/electrical-conductivity-and-ph-guide-for-hydroponics
- Stowe, Ohio Academy of Science, Kratky vs Deep Water Culture, Which One’s Better?, retrieved 2026-06-08, https://partner.projectboard.world/oas/project/kratky-vs-deep-water-culture-which-ones-better-edlydy
- Atlas Scientific, The Kratky Method and Why It Works for Beginner Hydroponic Growers, retrieved 2026-06-08, https://atlas-scientific.com/blog/kratky-method/
- UF/IFAS, “Set It and Forget It” Hydroponic Lettuce (HS1488), retrieved 2026-06-08, https://ask.ifas.ufl.edu/publication/HS1488